- 联系我们
- duidaima.com 版权声明
- 闽ICP备2020021581号
-
 闽公网安备 35020302035485号
闽公网安备 35020302035485号

3.web应用,本文使用springboot2+thymeleaf+joddhttp
代码片段:String AUTHORIZE_URL = "https://open.weixin.qq.com/connect/oauth2/authorize?appid=%s&redirect_uri=%s&response_type=%s&scope=%s&state=%s#wechat_redirect";
@GetMapping(value = "login")
public void wx(HttpServletRequest request, HttpServletResponse response) throws IOException {
//堆代码 duidaima.com
//1:重定向到授权页面: 引导用户进入授权页面同意授权,获取code
String codeUrl = String.format(AUTHORIZE_URL, APPID, URLEncoder.encode(REDIRECT_URI, "utf-8"), RESPONSE_TYPE, SCOPE, STATE);
response.sendRedirect(codeUrl);
}
String ACCESS_TOKEN_URL = "https://api.weixin.qq.com/sns/oauth2/access_token?appid=%s&secret=%s&code=%s&grant_type=authorization_code";
String GET_UERINFO_URL = "https://api.weixin.qq.com/sns/userinfo?access_token=%s&openid=%s&lang=zh_CN";
@GetMapping(value = "callback")
public ModelAndView wxcallback(@RequestParam("code") String code) throws IOException {
    //2:使用code换取access_token
    String accessTokenUrl = String.format(ACCESS_TOKEN_URL, APPID, APPSECRET, code);
    HttpResponse accessTokenResp = HttpRequest.get(accessTokenUrl).send();
    JSONObject jsonObject = JSON.parseObject(accessTokenResp.bodyText());
    String token = jsonObject.getString("access_token");
    String openid = jsonObject.getString("openid");
    //3:刷新access_token (if need)
    //4:获取用户信息
    String getUerinfoUrl = String.format(GET_UERINFO_URL, token, openid);
    HttpResponse userinfoResp = HttpRequest.get(getUerinfoUrl).send();
    WxUser wxUser = JSON.parseObject(userinfoResp.charset("utf-8").bodyText(), WxUser.class);
    ModelAndView modelAndView = new ModelAndView();
    modelAndView.addObject("userinfo", wxUser);
    modelAndView.setViewName("wx/wx_succ");
    return modelAndView;
}
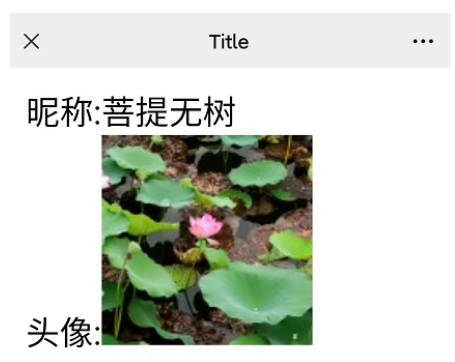
3.简单的测试页面,展示下用户数据<!DOCTYPE html>
<html lang="en" xmlns="http://www.w3.org/1999/xhtml"
xmlns:th="http://www.thymeleaf.org">
<head>
<meta charset="UTF-8">
<title>堆代码-duidaima.com</title>
</head>
<body>
<div>昵称:<p th:text="${userinfo.nickname}"></p></div>
<div>头像:<img width="100" th:src="${userinfo.headimgurl }"></div>
</body>
</html>
4.验证结果