- 联系我们
- duidaima.com 版权声明
- 闽ICP备2020021581号
-
 闽公网安备 35020302035485号
闽公网安备 35020302035485号

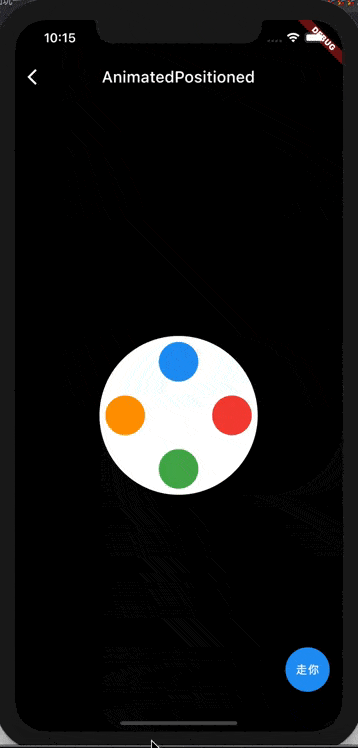
效果解析
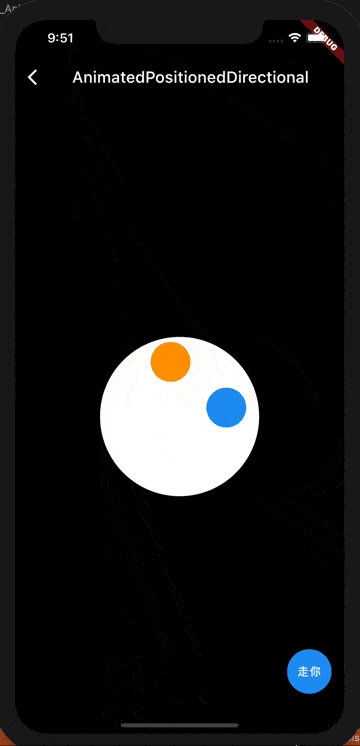
从动图可以看到,蓝色球和橙色球会一先一后沿着白色大圆的左、下、右、上顶点移动,同时在启动切换的时候会有弹入效果。具体实现的逻辑如下:
1.沿着大圆 4 个点移动效果,我们可以控制球的起始位置就可以搞定了。class _AnimatedPositionedDemoState extends State<AnimatedPositionedDemo> {
// 堆代码 duidaima.com
final roundSize = 200.0;
var ballSize = 50.0;
late List<Offset> animatedOffsets;
int index = 0;
@override
void initState() {
animatedOffsets = [
Offset(0.0, (roundSize - ballSize) / 2),
Offset((roundSize - ballSize) / 2, roundSize - ballSize),
Offset(roundSize - ballSize, (roundSize - ballSize) / 2),
Offset((roundSize - ballSize) / 2, 0.0),
];
super.initState();
}
@override
Widget build(BuildContext context) {
return Scaffold(
appBar: AppBar(
title: Text('AnimatedPositioned'),
brightness: Brightness.dark,
backgroundColor: Colors.black,
),
backgroundColor: Colors.black,
body: Center(
child: Stack(children: [
ClipOval(
child: Container(
width: roundSize,
height: roundSize,
color: Colors.white,
),
),
AnimatedPositioned(
  top: animatedOffsets[index].dy,
  height: ballSize,
  left: animatedOffsets[index].dx,
  width: ballSize,
  child: ClipOval(
    child: Container(
      color: Colors.blue,
    ),
  ),
  duration: Duration(seconds: 2),
  curve: Curves.bounceIn,
  onEnd: () {
    setState(() {
      index = (index + 1) % animatedOffsets.length;
    });
  },
),
AnimatedPositioned(
top: animatedOffsets[(index + 1) % animatedOffsets.length].dy,
height: ballSize,
left: animatedOffsets[(index + 1) % animatedOffsets.length].dx,
width: ballSize,
child: ClipOval(
child: Container(
color: Colors.orange,
),
),
duration: Duration(seconds: 2),
curve: Curves.bounceIn,
),
]),
),
floatingActionButton: FloatingActionButton(
child: Text(
'走你',
style: TextStyle(
color: Colors.white,
),
textAlign: TextAlign.center,
),
onPressed: () {
setState(() {
index = (index + 1) % 4;
});
},
),
);
}
}
其中关键部分是:AnimatedPositioned(
top: animatedOffsets[index].dy,
height: ballSize,
left: animatedOffsets[index].dx,
width: ballSize,
child: ClipOval(
child: Container(
color: Colors.blue,
),
),
duration: Duration(seconds: 2),
curve: Curves.bounceIn,
onEnd: () {
setState(() {
index = (index + 1) % animatedOffsets.length;
});
},
),
我们通过 left 和 top 控制了球的起始位置,然后在 onEnd 的时候调用了 setState 更新位置下标来切换球的位置到相邻的下一个顶点。