- 联系我们
- duidaima.com 版权声明
- 闽ICP备2020021581号
-
 闽公网安备 35020302035485号
闽公网安备 35020302035485号


细心的朋友们可能已经发现了,先在抖音、知乎、快手、小红书等这些平台已经上线了“网络用户显示 IP 的功能”,境外用户显示的是国家,国内的用户显示的省份,而且此项显示无法关闭,归属地强制显示。作为网友,我们可能只是看看戏,但是作为一个努力学习的码农,我们肯定要来看一下这个功能是怎么实现的,今天这篇文章,就用几分钟的时间来讲述一下这个功能是怎么实现的。
/**
 * 网络工具类
 *
 */
public class NetUtils {

    /**
     * 获取客户端 IP 地址
     * 堆代码 duidaima.com
     * @param request
     * @return
     */
    public static String getIpAddress(HttpServletRequest request) {
        String ip = request.getHeader("x-forwarded-for");
        if (ip == null || ip.length() == 0 || "unknown".equalsIgnoreCase(ip)) {
            ip = request.getHeader("Proxy-Client-IP");
        }
        if (ip == null || ip.length() == 0 || "unknown".equalsIgnoreCase(ip)) {
            ip = request.getHeader("WL-Proxy-Client-IP");
        }
        if (ip == null || ip.length() == 0 || "unknown".equalsIgnoreCase(ip)) {
            ip = request.getRemoteAddr();
            if (ip.equals("127.0.0.1")) {
                // 根据网卡取本机配置的 IP
                InetAddress inet = null;
                try {
                    inet = InetAddress.getLocalHost();
                } catch (Exception e) {
                    e.printStackTrace();
                }
                if (inet != null) {
                    ip = inet.getHostAddress();
                }
            }
        }
        // 多个代理的情况,第一个IP为客户端真实IP,多个IP按照','分割
        if (ip != null && ip.length() > 15) {
            if (ip.indexOf(",") > 0) {
                ip = ip.substring(0, ip.indexOf(","));
            }
        }
        // 本机访问
        if ("localhost".equalsIgnoreCase(ip) || "127.0.0.1".equalsIgnoreCase(ip) || "0:0:0:0:0:0:0:1".equalsIgnoreCase(ip)){
            // 根据网卡取本机配置的IP
            InetAddress inet;
            try {
                inet = InetAddress.getLocalHost();
                ip = inet.getHostAddress();
            } catch (UnknownHostException e) {
                e.printStackTrace();
            }
        }
        // 如果查找不到 IP,可以返回 127.0.0.1,可以做一定的处理,但是这里不考虑
        // if (ip == null) {
        //     return "127.0.0.1";
        // }
        return ip;
    }

  /**
     * 获取mac地址
     */
    public static String getMacAddress() throws Exception {
        // 取mac地址
        byte[] macAddressBytes = NetworkInterface.getByInetAddress(InetAddress.getLocalHost()).getHardwareAddress();
        // 下面代码是把mac地址拼装成String
        StringBuilder sb = new StringBuilder();
        for (int i = 0; i < macAddressBytes.length; i++) {
            if (i != 0) {
                sb.append("-");
            }
            // mac[i] & 0xFF 是为了把byte转化为正整数
            String s = Integer.toHexString(macAddressBytes[i] & 0xFF);
            sb.append(s.length() == 1 ? 0 + s : s);
        }
        return sb.toString().trim().toUpperCase();
    }
}
二.获取用户的 IP 地址属地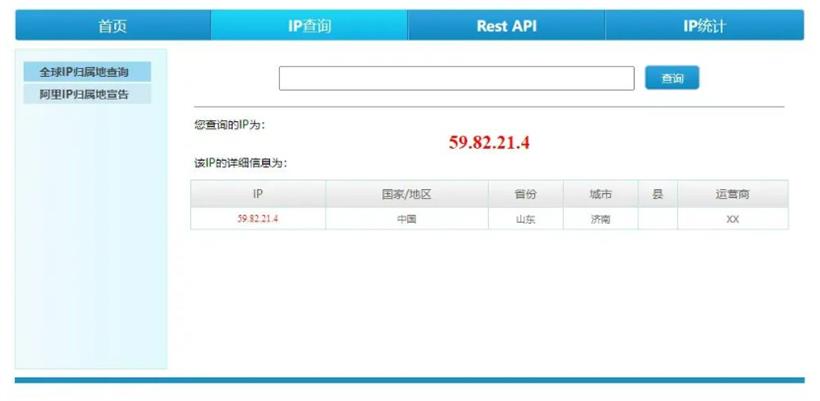

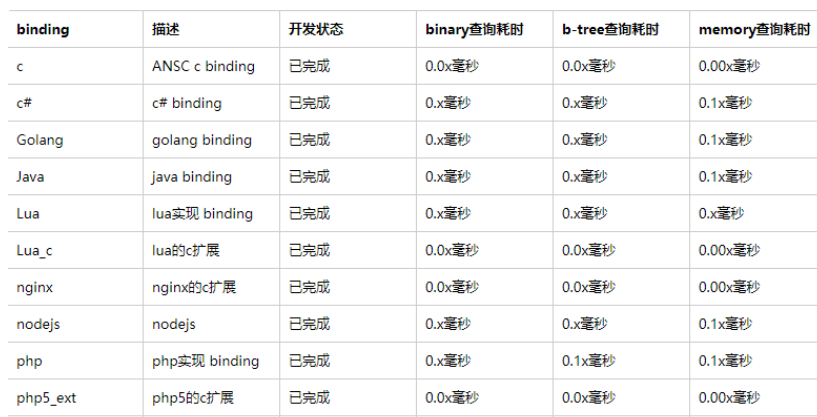
xdb 整个文件缓存:将整个 xdb 文件全部加载到内存,内存占用等同于 xdb 文件大小,无磁盘 IO 操作,保持微秒级别的查询效率。
<dependency>
  <groupId>com.github.hiwepy</groupId>
  <artifactId>ip2region-spring-boot-starter</artifactId>
  <version>2.0.1.RELEASE</version>
</dependency>
<dependency>
  <groupId>org.lionsoul</groupId>
  <artifactId>ip2region</artifactId>
  <version>2.7.0</version>
</dependency>
在引入 Maven 依赖之后,我们这里引入几种实现的方式:
import org.lionsoul.ip2region.xdb.Searcher;
import java.io.*;
import java.util.concurrent.TimeUnit;

public class SearcherTest {
    public static void main(String[] args) {
        // 1、创建 searcher 对象
        String dbPath = "ip2region.xdb file path";
        Searcher searcher = null;
        try {
            searcher = Searcher.newWithFileOnly(dbPath);
        } catch (IOException e) {
            System.out.printf("failed to create searcher with `%s`: %s\n", dbPath, e);
            return;
        }

        // 2、查询
        try {
            String ip = "1.2.3.4";
            long sTime = System.nanoTime();
            String region = searcher.search(ip);
            long cost = TimeUnit.NANOSECONDS.toMicros((long) (System.nanoTime() - sTime));
            System.out.printf("{region: %s, ioCount: %d, took: %d μs}\n", region, searcher.getIOCount(), cost);
        } catch (Exception e) {
            System.out.printf("failed to search(%s): %s\n", ip, e);
        }

        // 3、备注:并发使用,每个线程需要创建一个独立的 searcher 对象单独使用。
    }
}
3. 实现方式 2:【缓存VectorIndex索引】import org.lionsoul.ip2region.xdb.Searcher;
import java.io.*;
import java.util.concurrent.TimeUnit;
public class SearcherTest {
public static void main(String[] args) {
String dbPath = "ip2region.xdb file path";
// 1、从 dbPath 中预先加载 VectorIndex 缓存,并且把这个得到的数据作为全局变量,后续反复使用。
byte[] vIndex;
try {
vIndex = Searcher.loadVectorIndexFromFile(dbPath);
} catch (Exception e) {
System.out.printf("failed to load vector index from `%s`: %s\n", dbPath, e);
return;
}
// 2、使用全局的 vIndex 创建带 VectorIndex 缓存的查询对象。
Searcher searcher;
try {
searcher = Searcher.newWithVectorIndex(dbPath, vIndex);
} catch (Exception e) {
System.out.printf("failed to create vectorIndex cached searcher with `%s`: %s\n", dbPath, e);
return;
}
// 3、查询
try {
String ip = "1.2.3.4";
long sTime = System.nanoTime();
String region = searcher.search(ip);
long cost = TimeUnit.NANOSECONDS.toMicros((long) (System.nanoTime() - sTime));
System.out.printf("{region: %s, ioCount: %d, took: %d μs}\n", region, searcher.getIOCount(), cost);
} catch (Exception e) {
System.out.printf("failed to search(%s): %s\n", ip, e);
}
// 备注:每个线程需要单独创建一个独立的 Searcher 对象,但是都共享全局的制度 vIndex 缓存。
}
}
4. 实现方式 3:「缓存整个 xdb 数据」import org.lionsoul.ip2region.xdb.Searcher;
import java.io.*;
import java.util.concurrent.TimeUnit;
public class SearcherTest {
public static void main(String[] args) {
String dbPath = "ip2region.xdb file path";
// 1、从 dbPath 加载整个 xdb 到内存。
byte[] cBuff;
try {
cBuff = Searcher.loadContentFromFile(dbPath);
} catch (Exception e) {
System.out.printf("failed to load content from `%s`: %s\n", dbPath, e);
return;
}
// 2、使用上述的 cBuff 创建一个完全基于内存的查询对象。
Searcher searcher;
try {
searcher = Searcher.newWithBuffer(cBuff);
} catch (Exception e) {
System.out.printf("failed to create content cached searcher: %s\n", e);
return;
}
// 3、查询
try {
String ip = "1.2.3.4";
long sTime = System.nanoTime();
String region = searcher.search(ip);
long cost = TimeUnit.NANOSECONDS.toMicros((long) (System.nanoTime() - sTime));
System.out.printf("{region: %s, ioCount: %d, took: %d μs}\n", region, searcher.getIOCount(), cost);
} catch (Exception e) {
System.out.printf("failed to search(%s): %s\n", ip, e);
}
// 备注:并发使用,用整个 xdb 数据缓存创建的查询对象可以安全的用于并发,也就是你可以把这个 searcher 对象做成全局对象去跨线程访问。
}
}
5. 编译测试程序# cd 到 java binding 的根目录 cd binding/java/ mvn compile package然后会在当前目录的 target 目录下得到一个 ip2region-{version}.jar 的打包文件。
➜  java git:(v2.0_xdb) ✗ java -jar target/ip2region-2.6.0.jar search
java -jar ip2region-{version}.jar search [command options]
options:
 --db string              ip2region binary xdb file path
 --cache-policy string    cache policy: file/vectorIndex/content
例如:使用默认的 data/ip2region.xdb 文件进行查询测试:➜ java git:(v2.0_xdb) ✗ java -jar target/ip2region-2.6.0.jar search --db=../../data/ip2region.xdb
ip2region xdb searcher test program, cachePolicy: vectorIndex
type 'quit' to exit
ip2region>> 1.2.3.4
{region: 美国|0|华盛顿|0|谷歌, ioCount: 7, took: 82 μs}
ip2region>>
输入 ip 即可进行查询测试,也可以分别设置 cache-policy 为 file/vectorIndex/content 来测试三种不同缓存实现的查询效果。➜ java git:(v2.0_xdb) ✗ java -jar target/ip2region-2.6.0.jar bench
java -jar ip2region-{version}.jar bench [command options]
options:
--db string ip2region binary xdb file path
--src string source ip text file path
--cache-policy string cache policy: file/vectorIndex/content
例如:通过默认的 data/ip2region.xdb 和 data/ip.merge.txt 文件进行 bench 测试:➜ java git:(v2.0_xdb) ✗ java -jar target/ip2region-2.6.0.jar bench --db=../../data/ip2region.xdb --src=../../data/ip.merge.txt
Bench finished, {cachePolicy: vectorIndex, total: 3417955, took: 8s, cost: 2 μs/op}
可以通过分别设置 cache-policy 为 file/vectorIndex/content 来测试三种不同缓存实现的效果。