- 联系我们
- duidaima.com 版权声明
- 闽ICP备2020021581号
-
 闽公网安备 35020302035485号
闽公网安备 35020302035485号

toolbar: {
    container: [
        ["bold", "italic", "underline", "strike"], // 加粗 斜体 下划线 删除线
        [{ header: 1 }, { header: 2 }], // 1、2 级标题
        [{ indent: "-1" }, { indent: "+1" }], // 缩进
        [{ direction: "rtl" }], // 文本方向
        [{ size: ["small", false, "large", "huge"] }], // 字体大小
        [{ header: [1, 2, 3, 4, 5, 6, false] }], // 标题
        [{ color: [] }, { background: [] }], // 字体颜色、字体背景颜色
        [{ font: [] }], // 字体种类
        [{ align: [] }], // 对齐方式
        ["clean"], // 清除文本格式
        ["image", "video"], // 图片, 视频
        ["emoji"], //表情包
        [{ lineHeight: lineHeightStyle.whitelist }], //行高
    ], // 工具菜单栏配置
    handlers: {
        lineHeight: (value) => {
            if (value) {
                let quill = this.$refs.myQuillEditor.quill;
                quill.format("lineHeight", value);
            }
        },
        video: (value) => {
            this.videoDialog.show = true;
        },
    },
},
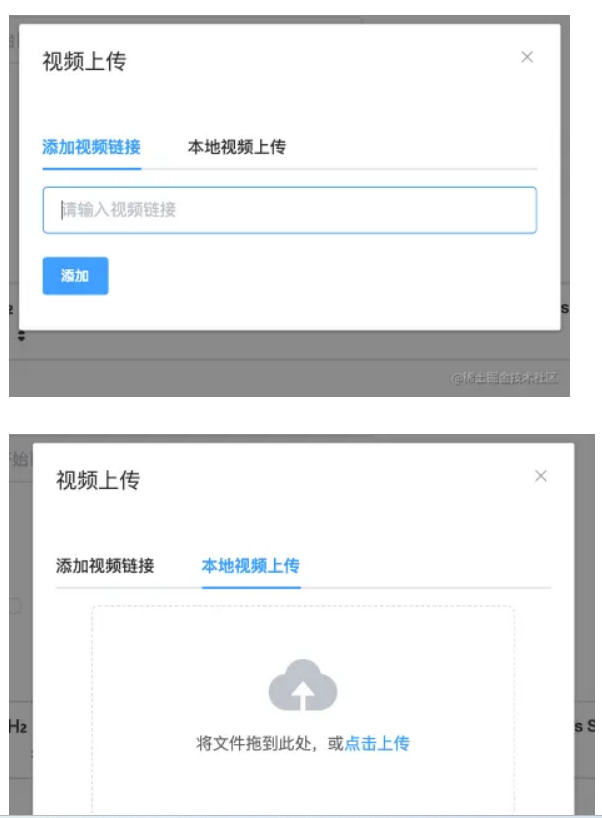
点击 toolbar 内的 video 按钮时,弹出上传视频的弹框:<!--视频上传 堆代码 duidaima.com-->
<div>
<el-dialog :close-on-click-modal="false" width="50%" style="margin-top: 1px" title="视频上传" :visible.sync="videoDialog.show" append-to-body>
<el-tabs v-model="videoDialog.activeName">
<el-tab-pane label="添加视频链接" name="first">
<el-input v-model="videoDialog.videoLink" placeholder="请输入视频链接" clearable></el-input>
<el-button type="primary" size="small" style="margin: 20px 0px 0px 0px" @click="addVideoLink(videoDialog.videoLink)">添加 </el-button>
</el-tab-pane>
<el-tab-pane label="本地视频上传" name="second">
<el-upload
v-loading="uploading"
style="text-align: center"
drag
:action="uploadUrl"
accept="video/*"
:data="videoFileData"
:before-upload="onBeforeUploadVideo"
:on-success="onSuccessVideo"
:on-error="onErrorVideo"
:multiple="false"
>
<i class="el-icon-upload"></i>
<div class="el-upload__text">将文件拖到此处,或<em>点击上传</em></div>
</el-upload>
</el-tab-pane>
</el-tabs>
</el-dialog>
</div>
视频上传的回调函数:// --------- 视频相关 ---------
addVideoLink(videoLink) {
if (!videoLink) return this.$message.error("请输入视频地址");
this.videoDialog.show = false;
let range = this.editor.selection.savedRange;
let index = 0;
if (range != null) {
index = range.index;
}
// 插入
this.editor.insertEmbed(index, "video", videoLink);
// 调整光标到最后
this.editor.setSelection(index + 1);
},
// el-文件上传组件
onBeforeUploadVideo(file) {
this.loading = true;
let acceptArr = ["video/mp4"];
const isVideo = acceptArr.includes(file.type);
if (isVideo) {
console.log(file.name);
//笔者公司的视频托管在七牛云,读者按照自己公司的业务配置
return api.getQiniuToken().then((res) => {
// 配置上传的七牛token
this.videoFileData = {
token: res.retInfo,
name: file.name,
key: Math.floor(Math.random() * 100 + 1) + file.name,
};
});
} else {
return false;
}
},
onSuccessVideo(res) {
this.uploading = false;
//笔者公司的视频托管在七牛云,读者按照自己公司的业务配置
const videoUrl = "xxx" + res.retInfo;
this.addVideoLink(videoUrl);
},
onErrorVideo(file, fileList) {
this.uploading = false;
this.$message.error("上传失败");
},
// --------- 视频相关 ---------
重点:addVideoLink的功能是将视频链接插入到quill-editor编辑框内,let range = this.editor.selection.savedRange; 是计算编辑框光标的位置(其中this.editor = this.$refs.myQuillEditor.quill)。刚开始用的是this.editor.getSelection(),第一次插入视频时,获取的range总是为null,换成this.editor.selection.savedRange后,获取range就正常了。<iframe class="ql-video" frameborder="0" allowfullscreen="true" src="https://xxx.com/65IMG_3870.mp4"></iframe><p><br></p>将iframe标签换成 html5 内的video标签:
import { Quill } from "vue-quill-editor";
// 堆代码 duidaima.com
// 源码中是import直接导入,这里要用Quill.import引入
const BlockEmbed = Quill.import("blots/block/embed");
const Link = Quill.import("formats/link");
const ATTRIBUTES = ["height", "width"];
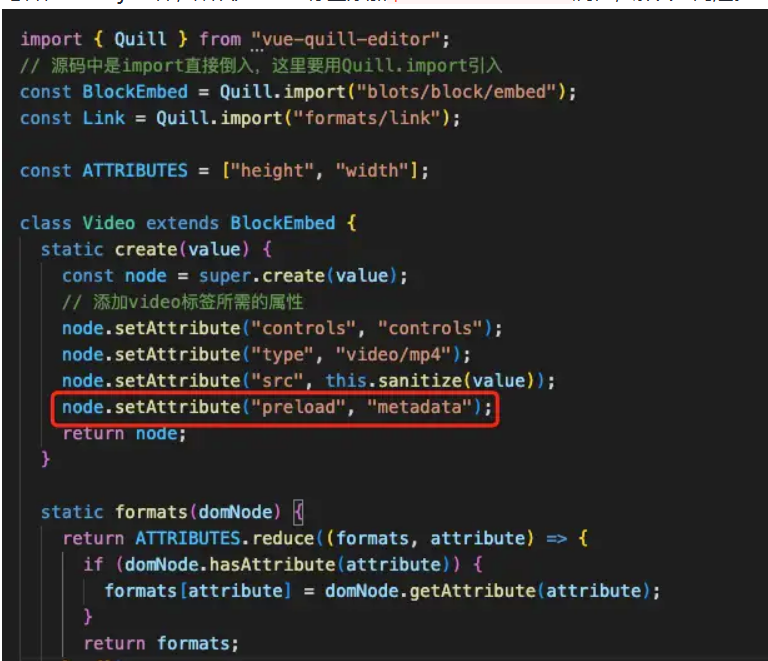
class Video extends BlockEmbed {
static create(value) {
const node = super.create(value);
// 添加video标签所需的属性
node.setAttribute("controls", "controls");
node.setAttribute("type", "video/mp4");
node.setAttribute("src", this.sanitize(value));
//为了兼容 iOS 设备上,显示海报图(视频封面)
node.setAttribute("preload", "metadata");
return node;
}
static formats(domNode) {
return ATTRIBUTES.reduce((formats, attribute) => {
if (domNode.hasAttribute(attribute)) {
formats[attribute] = domNode.getAttribute(attribute);
}
return formats;
}, {});
}
static sanitize(url) {
return Link.sanitize(url); // eslint-disable-line import/no-named-as-default-member
}
static value(domNode) {
return domNode.getAttribute("src");
}
format(name, value) {
if (ATTRIBUTES.indexOf(name) > -1) {
if (value) {
this.domNode.setAttribute(name, value);
} else {
this.domNode.removeAttribute(name);
}
} else {
super.format(name, value);
}
}
html() {
const { video } = this.value();
return `<a href="${video}">${video}</a>`;
}
}
Video.blotName = "video";
Video.className = "ql-video";
Video.tagName = "video"; // 用video标签替换iframe
export default Video;
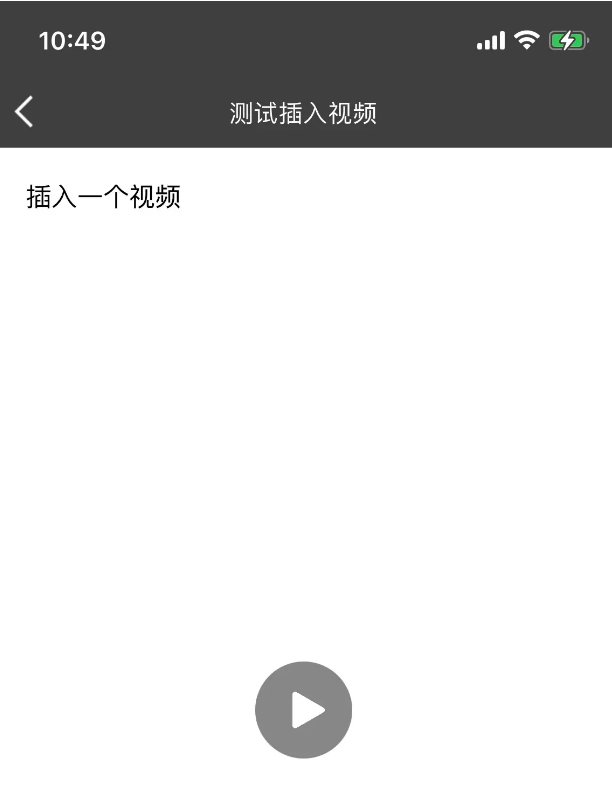
将 video.js 引入到 quill-editor 所在文件:import Video from "../utils/video"; Quill.register(Video, true);将入视频后,样式如下:
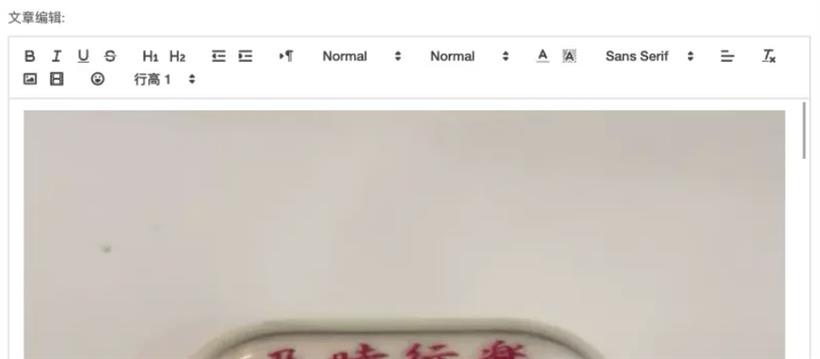
<video class="ql-video" controls="controls" type="video/mp4" src="https://xxx.com/65IMG_3870.mp4"></video><p><br></p>生成的iframe标签页面和video标签页面效果对比:
//富文本视频第一帧作为封面
videoCover(item, url) {
    const video = item; // 获取视频对象
    let canvas = document.createElement("canvas"); //创建canvas
    video.src = url; // video的url地址
    const ctx = canvas.getContext("2d"); // 绘制2d
    video.crossOrigin = "anonymous"; // 解决跨域问题
    video.currentTime = 1; // 视频第一帧
    video.addEventListener('loadeddata', function () {
        canvas.width = video.clientWidth; // 视频宽度
        canvas.height = video.clientHeight; //视频高度
        // 利用canvas对象方法绘图
        ctx.drawImage(video, 0, 0, video.clientWidth, video.clientHeight);
        // 转换成base64形式并设置封面
        video.poster = canvas.toDataURL("image/jpeg", 1); // 截取后的视频封面
    });
},
//在vue的updated函数中调用videoCover函数:
updated() {
     //在vue中使用document.querySelectorAll时,必须在mounted、updated等函数中调用,才能获取到document内容
    const videos = document.querySelectorAll("video");
    videos.forEach((item) => {
            this.videoCover(item, item.src);
    });
},
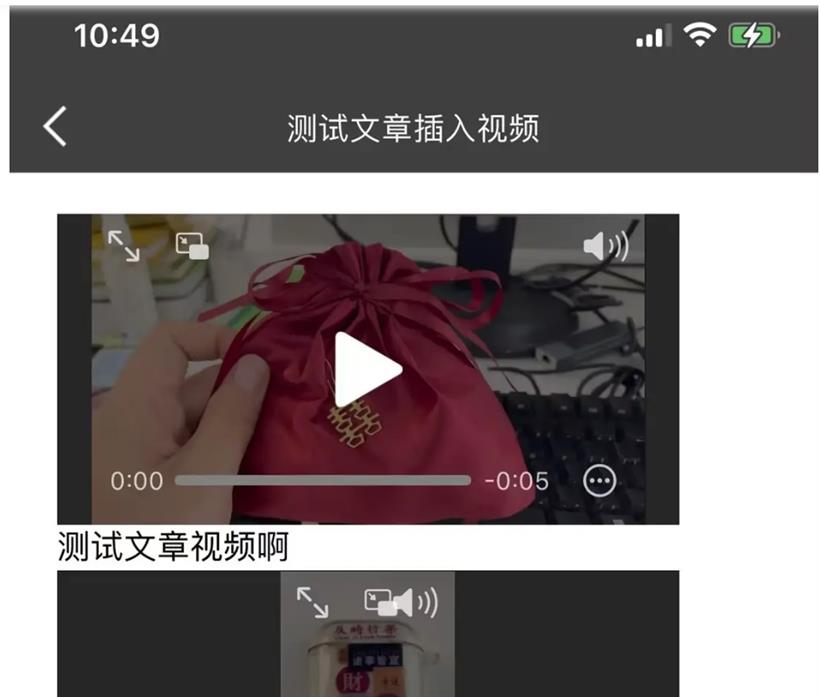
实现上述的想法,打开调试时,发现video标签内并没有设置poster属性。打断点调试,发现在iOS设备上,根本没有调用loadeddata方法。在stackoverflow上,发现有开发者回答笔者的疑惑。大概意思是:在iOS设备上,video标签不会默认加载视频数据。
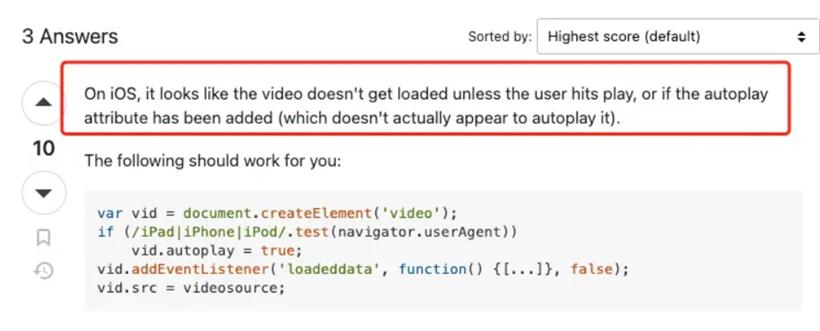
然后此回答下面有其他开发者回答,为video标签添加preload="metadata"属性,就可以在iOS设备上显示海报图了。