- 联系我们
- duidaima.com 版权声明
- 闽ICP备2020021581号
-
 闽公网安备 35020302035485号
闽公网安备 35020302035485号


server {
listen 443 ssl http2;
server_name helloai.wiki;
……
# 堆代码 duidaima.com
# nginx是就近原则,匹配到即执行,所以这个配置要写在txt后缀配置前面才可以
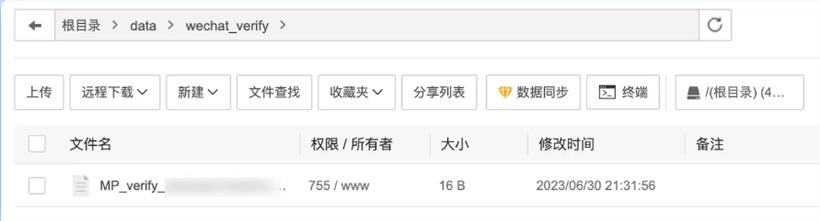
location = /MP_verify_NEeu6p17AOHCCOM5.txt {
root /data/wechat_verify;
}
# 如果你把校验文件放到下面这个配置的路径,那就不用加上面的配置了
# 至于我为什么不放在这里,因为我怕public被我更新了
location ~* \.(txt|xml)$ {
root /data/xxxxx/public;
}
……
}
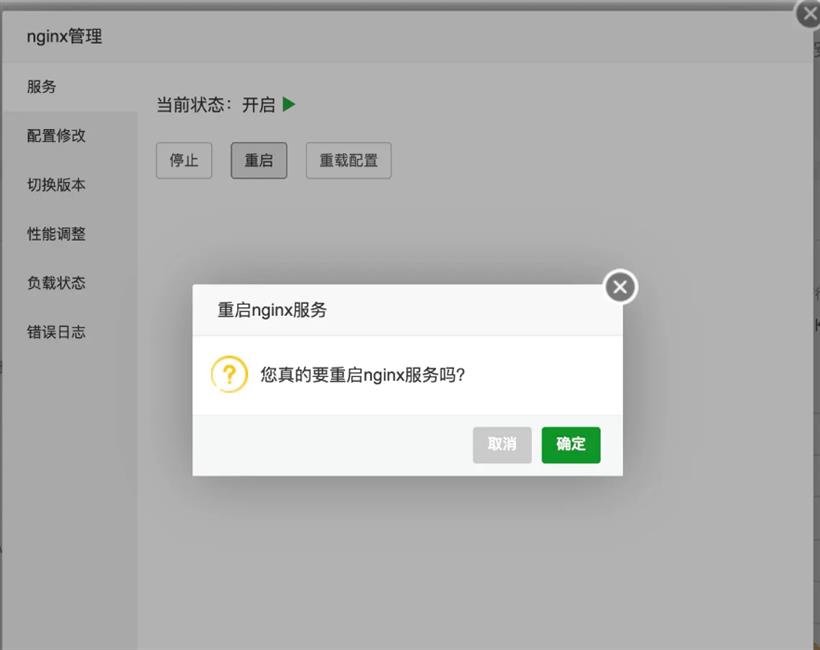
修改完nginx配置,重启一下才会生效。

// 这是midwayjs框架的代码
// 堆代码 duidaima.com
@Get('/verify_server')
  async verifyServer(@Query() query: any) {
// 微信调用时会传入以下几个参数
    const signature = query.signature;
    const timestamp = query.timestamp;
    const nonce = query.nonce;
    const echostr = query.echostr;
    const apiToken = this.WX_API_TOKEN; // 你将在测试账号页面填写的Token

// 解密信息
    if (checkSignature(signature, timestamp, nonce, apiToken)) {
      // 如果签名正确,原样返回echostr参数内容
      return echostr;
    } else {
      // 如果签名错误,返回错误信息
      throw new Error('');
    }
  }
第二步:解密方法const crypto = require('crypto');
export function checkSignature(signature: string, timestamp, nonce, token) {
// 将token、timestamp、nonce三个参数按照字典序排序
const arr = [token, timestamp, nonce].sort();
// 将排序后的参数拼接起来
const str = arr.join('');
// 对拼接后的字符串进行sha1加密
const sha1 = crypto.createHash('sha1');
sha1.update(str);
const result = sha1.digest('hex');
return result === signature;
}
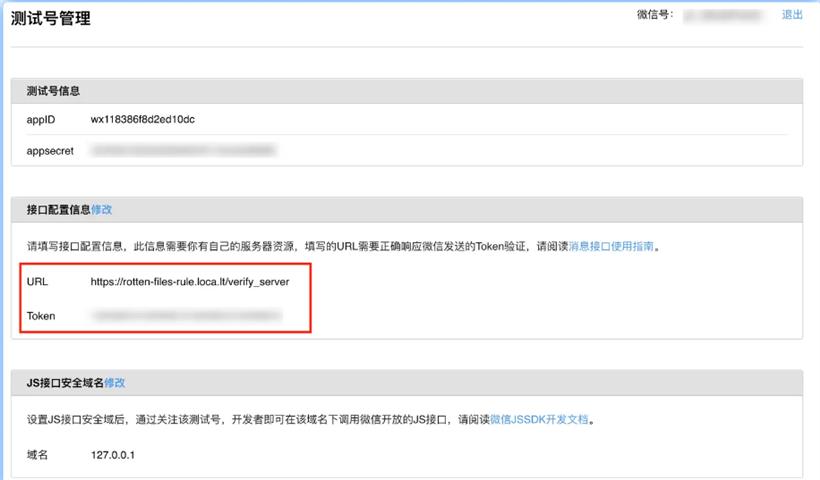
接口准备好了之后,就可以去填写配置了。但是,现在是在本地开发,我们得想办法让微信调用到本地的服务,这时候就需要内网穿透工具来帮助我们了。# 全局安装: npm install –g localtunnel # 启动服务,3000替换成你的服务的端口, lt --port 3000代理成功后就会看到代理的url,这就是我们要使用的服务器地址了

// utils/xml2json.ts
// 服务器和微信交互的信息要用xml格式,这可不是JSer的菜,所以我们先来写一下xml和json的转换方法
import { parseString, Builder } from 'xml2js';
export function xml2json(xml: string): any {
let result: any;
parseString(xml, { mergeAttrs: true }, (err, res) => {
console.log(xml, res);
result = res.xml;
});
return result;
}
export function json2xml(json: any): any {
const builder = new Builder();
const xml = builder.buildObject({ xml: json });
return xml;
}
typescript复制代码@Post('/verify_server')
async wxMessage(@Body() body: any) {
try {
const json = await xml2json(body);
const gzhId = json.ToUserName[0];
const wxOpenId = json.FromUserName[0];
// const time = json.CreateTime[0]; // 10位时间戳
// const msgId = json.MsgId[0];
const msgType = json.MsgType[0];
let replyMessage = {};
console.log(json, gzhId, wxOpenId, msgType);
// 可以根据推送事件类型去做处理,下面代码只演示文字消息
if (msgType === 'text') {
replyMessage = {
FromUserName: gzhId,
ToUserName: wxOpenId,
MsgType: 'text',
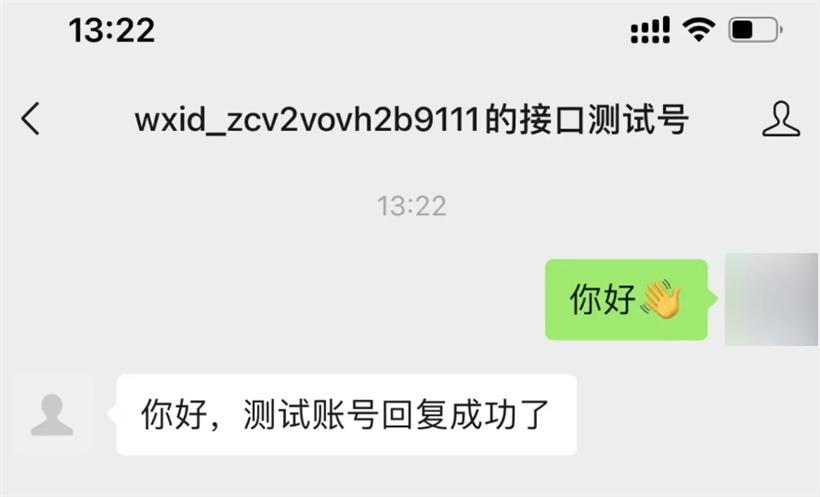
Content: '你好,测试账号回复成功了',
CreateTime: new Date().valueOf(),
};
}
const xmlMessage = await json2xml(replyMessage);
return xmlMessage;
} catch (e) {
console.log(e);
}
}
拿起你的手机,关注配置页的测试账号