- 联系我们
- duidaima.com 版权声明
- 闽ICP备2020021581号
-
 闽公网安备 35020302035485号
闽公网安备 35020302035485号

可能有些同学会问,我们有很多开源的UI库可用,为什么还需要自己去开发组件库呢?是的,大部分业务场景下,在一些要求UI不高,或者公司体量不大的情况下,这些开源的库足以满足我们日常开发的需求,但是一但达到一定的量级,公司就会升级视觉,交互,这时候如果有多个项目,共用了一套UI视觉设计,那么你怎么办呢?总不至于每个项目拷贝一份吧,此时我们的UI库就需要独立出来,打包成私有的NPM包,供给公司每个业务系统用。
加上最近dumi升级到了2.0版本,使用起来更加的友好,总结起来就是,更好,更快,更便捷,当然更强!所以我们直接开撸!
node -v v14.19.12、脚手架
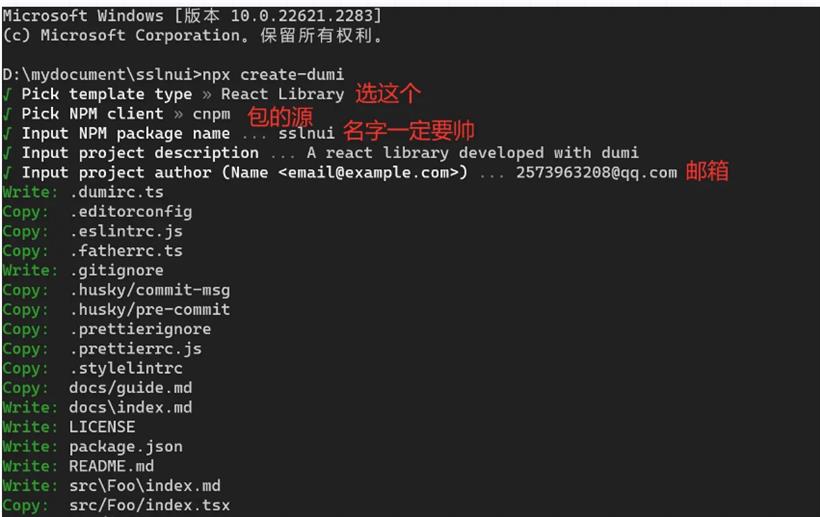
# 先找个地方建个空目录。
mkdir myapp && cd myapp
# 执行npx create-dumi 命令,此时进入cli命令开始操作,如下图所示
themeConfig: {
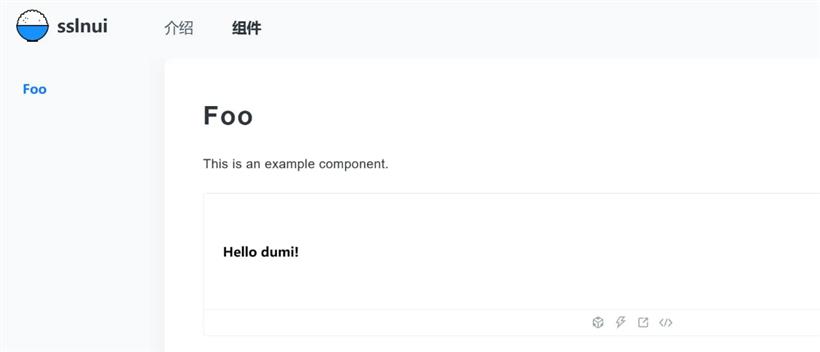
name: 'sslnui',
nav: [
{ title: '介绍', link: '/guide' },
{ title: '组件', link: '/components/Foo' },
],
},
@sslnui-primary: #a862ea;2、写个组件
import classNames from 'classnames';
import React, { AnchorHTMLAttributes, ButtonHTMLAttributes, FC } from 'react';
import './index.less';

export type ButtonSize = 'lg' | 'sm';
export type ButtonType = 'primary' | 'default' | 'danger' | 'link';

interface BaseButtonProps {
  size?: ButtonSize;
  btnType?: ButtonType;
  children: React.ReactNode;
  href?: string;
  disabled?: boolean;
}

type NativeButtonProps = BaseButtonProps &
  ButtonHTMLAttributes<HTMLButtonElement>;
type AnchorButtonProps = BaseButtonProps &
  AnchorHTMLAttributes<HTMLAnchorElement>;
// 堆代码 duidaima.com
// 定义 Button 组件默认属性类型
interface ButtonDefaultProps {
  btnType?: ButtonType;
}

export type ButtonProps = Partial<
  NativeButtonProps & AnchorButtonProps & ButtonDefaultProps
>;

export const Button: FC<ButtonProps> = (props) => {
  const { btnType, size, children, href, disabled, ...restProps } = props;

  const classes = classNames('btn', btnType, size);

  if (btnType === 'link' && href) {
    return (
      <a className={classes} href={href} {...restProps}>
        {children}
      </a>
    );
  } else {
    return (
      <button
        className={classes}
        disabled={disabled}
        {...restProps}
        type="button"
      >
        {children}
      </button>
    );
  }
};

// 设置 Button 组件的默认属性
Button.defaultProps = {
  btnType: 'default',
};

export default Button;
然后写less样式,代码如下:@import '../global.less';
.btn {
// width: 100px;
padding: 8px 16px;
border-width: 0px;
cursor: pointer;
}
.primary {
border-radius: 8px;
// padding: 8px;
background: @sslnui-primary;
font-family: Source Han Sans CN;
font-size: 14px;
font-weight: 500;
display: flex;
flex-direction: row;
align-items: center;
justify-content: center;
letter-spacing: 0em;
color: #ffffff;
// transition: all ease-in-out 0.15s;
&:hover {
background: @sslnui-primary;
}
}
.default {
border-radius: 8px;
// padding: 8px 14px;
background: #f0f2f5;
font-family: Source Han Sans CN;
font-size: 14px;
font-weight: 500;
display: flex;
flex-direction: row;
align-items: center;
justify-content: center;
letter-spacing: 0em;
color: #5b667c;
transition: all ease-in-out 0.15s;
&:hover {
color: #0e1420 !important;
}
}
.link {
outline: none;
position: relative;
display: inline-block;
font-weight: 400;
white-space: nowrap;
text-align: center;
background-image: none;
background-color: transparent;
border: 1px solid transparent;
cursor: pointer;
transition: all 0.2s cubic-bezier(0.645, 0.045, 0.355, 1);
user-select: none;
touch-action: manipulation;
line-height: 1.5714285714285714;
color: rgba(0, 0, 0, 0.88);
color: @sslnui-primary;
&:hover {
color: @sslnui-primary;
}
}
.danger {
border-radius: 8px;
// padding: 8px 14px;
background: #ffffff;
box-shadow: 2px 0px 6px 0px rgba(0, 0, 0, 0.07);
font-family: Source Han Sans CN;
font-size: 14px;
font-weight: 500;
display: flex;
flex-direction: row;
align-items: center;
justify-content: center;
letter-spacing: 0em;
color: #0e1420;
}
.disabled {
cursor: not-allowed;
border-radius: 8px;
background: rgba(71, 92, 246, 0.4);
&:hover {
background: rgba(71, 92, 246, 0.4);
}
}
.lg {
width: 120px;
height: 38px;
}
.sm {
width: 100px;
}
最后我们在index.md文件中编写文档。## 代码演示
import React from 'react';
import { Button } from 'sslnui';
export default () => {
return (
<>
<Button btnType="default">默认按钮</Button>
<Button btnType="primary">主要按钮</Button>
</>
);
};
此时让我们进入到组件目录下,点击button按钮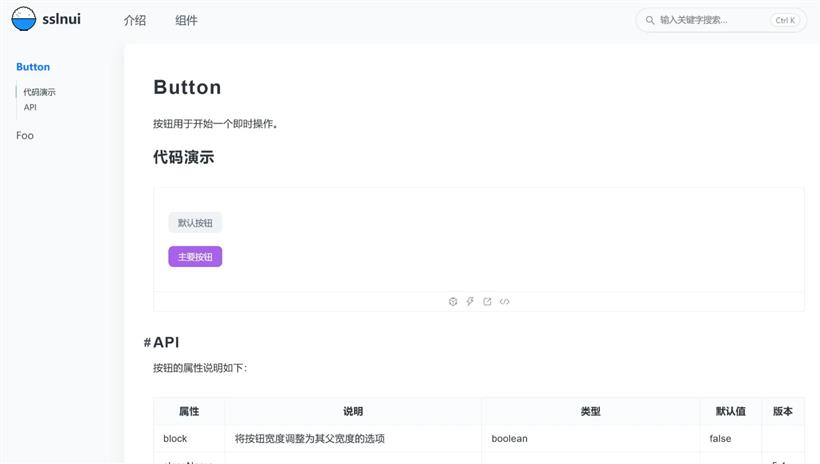
cnpm i jest @testing-library/react @types/jest ts-jest jest-environment-jsdom jest-less-loader typescript@4 -D命令执行完毕后,我们在根目录下创建jest.config.js文件
/** @type {import('ts-jest').JestConfigWithTsJest} */
module.exports = {
  preset: 'ts-jest',
  testEnvironment: 'jsdom',
  roots: ['./src'], // 查找src目录中的文件
  collectCoverage: true, // 统计覆盖率
  coverageDirectory: 'coverage', // 覆盖率结果输出的文件夹
  transform: {
    '.(less|css)$': 'jest-less-loader', // 支持less
  },
  // 单元覆盖率统计的文件
  collectCoverageFrom: [
    'src/**/*.tsx',
    'src/**/*.ts',
  ],
};
然后再src/Button目录下创建测试文件index.test.tsx,内容如下:import { fireEvent, render } from '@testing-library/react';
import React from 'react';
import Button from './index';
describe('Button组件', () => {
it('能够正确渲染按钮文字', () => {
const buttonText = '正确';
const { getByRole } = render(<Button>{buttonText}</Button>);
const buttonElement = getByRole('button');
expect(buttonElement.innerHTML).toBe(buttonText);
});
it('能够正确渲染主要样式的按钮', () => {
const { getByRole } = render(<Button btnType="primary">主要按钮</Button>);
const buttonElement = getByRole('button');
expect(buttonElement.classList.contains('primary')).toBe(true);
});
it('能够触发点击事件', () => {
const handleClick = jest.fn();
const { getByRole } = render(
<Button btnType="primary" onClick={handleClick}>
点击按钮
</Button>,
);
const buttonElement = getByRole('button');
fireEvent.click(buttonElement);
// 断言函数被调用了一次。
expect(handleClick).toHaveBeenCalledTimes(1);
});
});
配置好后我们在控制台执行npx jest就会对代码库进行全量检查,如果你的控制台也输出这样,表示是成功的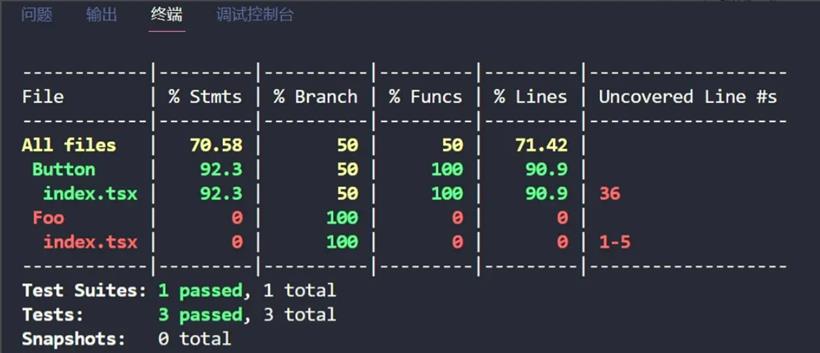
const fs = require('fs').promises;
const path = require('path');
const { execSync } = require('child_process');

/** 处理jest只执行本次修改到的工具方法内的测试用例 */
async function start() {
  /** 1. 获取git add 的文件的列表 */
  const addFiles = execSync(`git diff --staged --diff-filter=ACMR --name-only`)
    .toString()
    .split('\n');
  /** 2. 获取文件的绝对路径 */
  const diffFileList = addFiles
    .filter(Boolean)
    .map((item) => path.join(__dirname, item));

  /** 3. 获取src源码目录 */
  const srcPath = path.join(__dirname, './src');

  /** 4. 记录本次修改的函数方法 */
  const diffFileMap = {};
  diffFileList.forEach((filePath) => {
    if (
      filePath.includes(srcPath) &&
      (filePath.endsWith('.ts') || filePath.endsWith('.tsx'))
    ) {
      const relativePath = path.relative(srcPath, filePath);
      if (relativePath.includes('/')) {
        diffFileMap[relativePath.split('/')[0]] = true;
      }
    }
  });

  console.log('本次改动的方法', Object.keys(diffFileMap));

  /** 5. 找到改动方法下面所有的单元测试文件 */
  const list = (
    await Promise.all(
      Object.keys(diffFileMap).map(async (toolPath) => {
        const testsDir = path.join(srcPath, toolPath, '__tests__');
        try {
          const files = await fs.readdir(testsDir);
          return files.map((item) => path.join(testsDir, item));
        } catch (error) {
          return [];
        }
      }),
    )
  ).flat();

  /** 6. 执行单元测试脚本 */
  if (list.length) {
    try {
      execSync(`npx jest --bail --findRelatedTests ${list.join(/ /)}`, {
        cwd: __dirname,
        stdio: 'inherit',
      });
    } catch (error) {
      process.exit(1);
    }
  }
}

start();
然后在package中添加命令scripts": { "test:staged": "node jest.staged.js" }
然后再控制台执行npm run test:staged就可以只针对变动的地方测试了。